

Setting up a weekly schedule
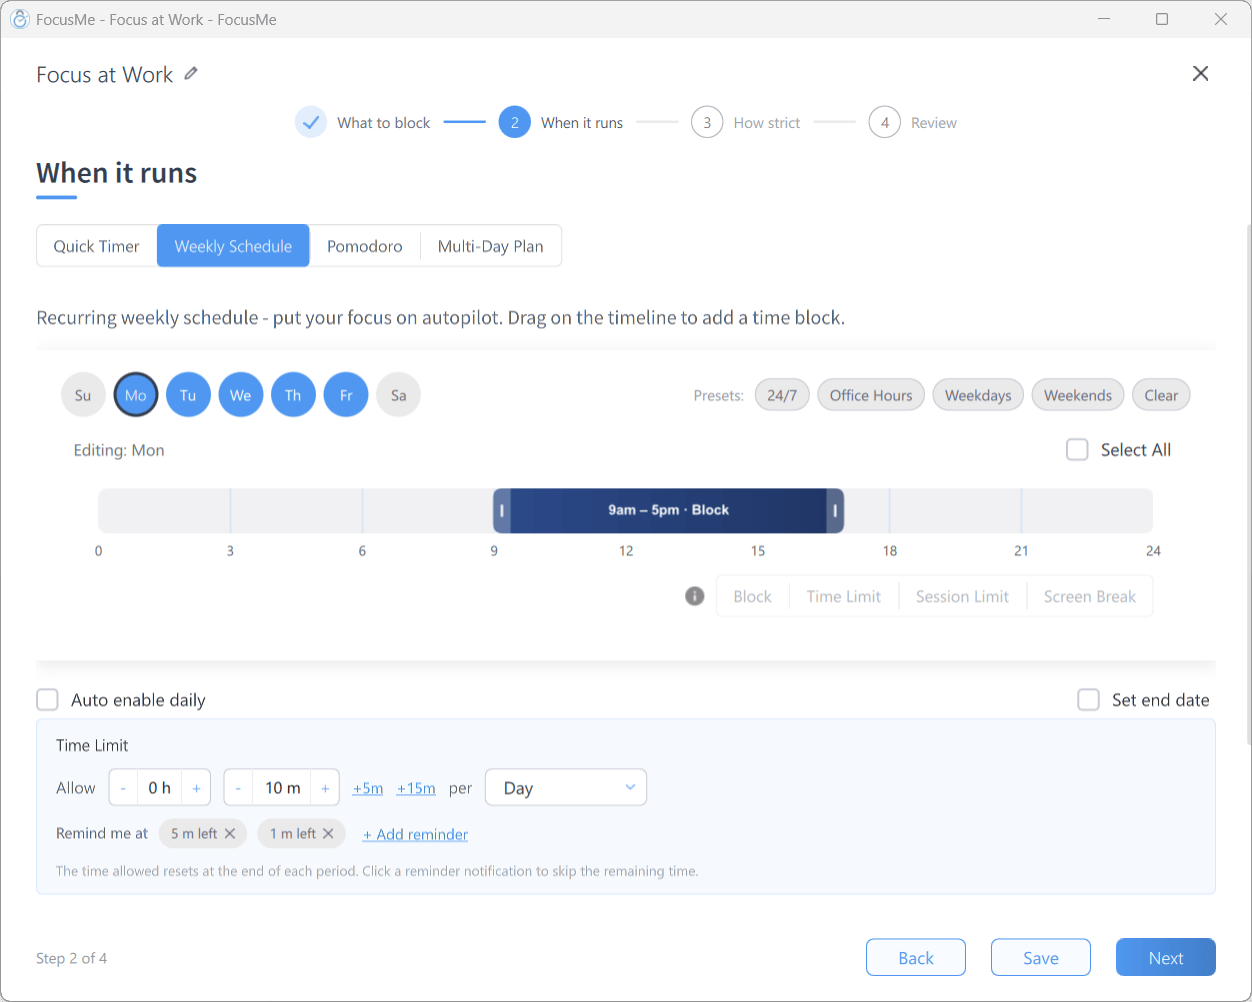
Step 2 When it runs with Weekly Schedule: day pills, preset chips and the timeline
- In the Plan Wizard, go to When it runs and choose Weekly Schedule in the segmented control
- Click a preset chip to fill the week in one go, or pick days and draw blocks yourself (below)
- Continue with Next to How strict and Review, then click Create & Enable
Presets
Presets are a starting point: after applying one, drag the blocks to fine-tune them.
Drawing blocks yourself
- Click a day pill to select it. Click several, or use Select All, to edit them together. The label reads Editing: Mon, Tue (changes apply to all selected days)
- Drag on the timeline to add a time block. Drag a block’s edge to change its length, or select it and type exact start and end times in the Interval fields
- Add as many blocks per day as you need, leaving gaps where the plan should be off
If you select days that already have different schedules, the Different Schedules dialog asks which day’s schedule to keep for all of them before you edit.
A rule mode for every block
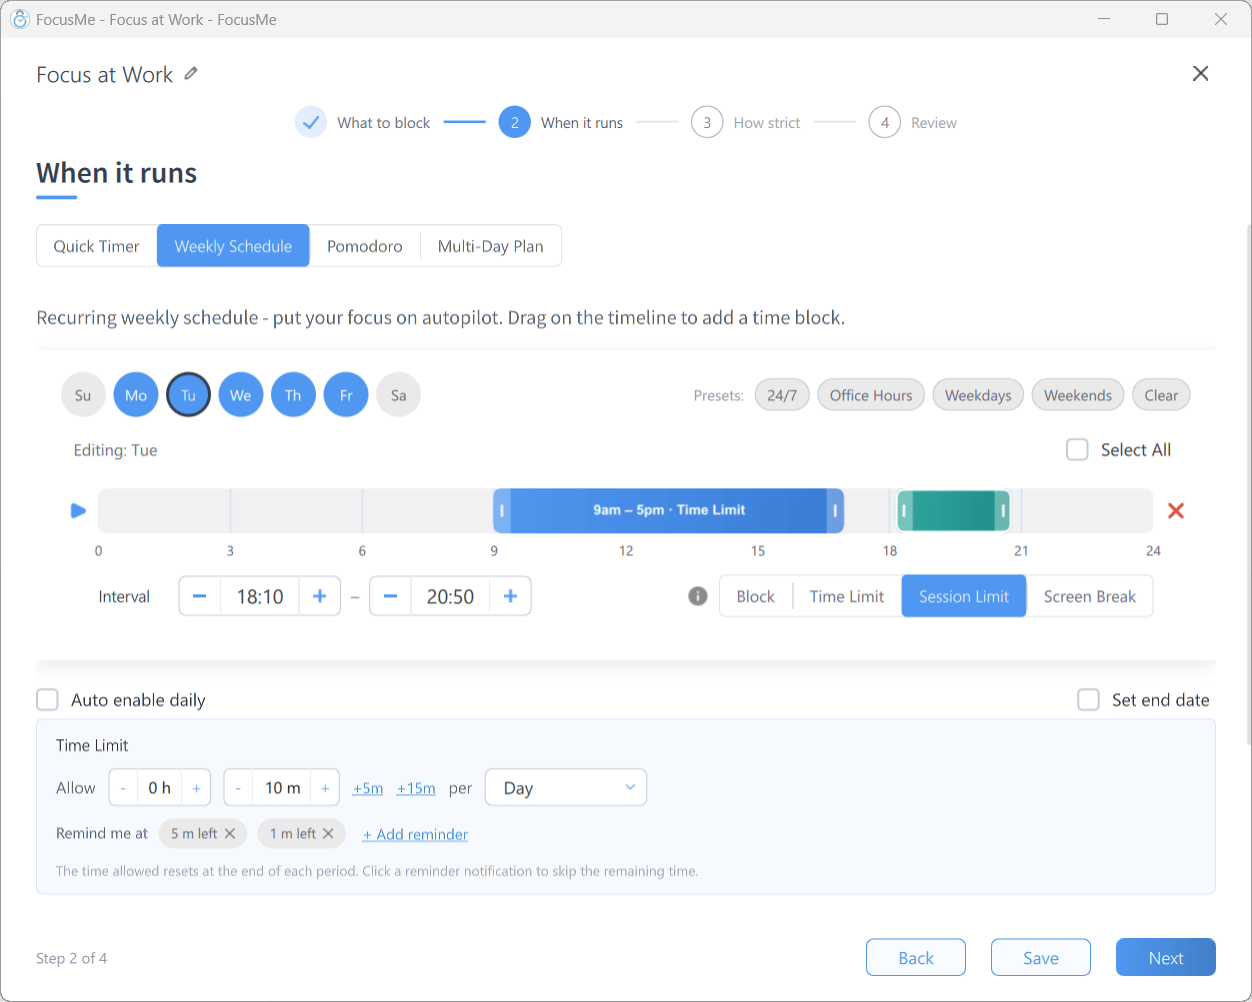
A weekly schedule whose blocks use different rule modes
Options under the timeline
- Auto enable daily — re-enables the plan every day, so it cannot stay switched off after you stop it
- Set end date — tick it and choose a date; the plan stops running after that date. Useful with Enforced protection, so there is always a way out
Examples
Work hours: click Weekdays, then drag the block on each day to 09:00 – 17:00 (or start from Office Hours). Evening wind-down: Select All, then draw a block from 22:00 to the end of the day. To carry it past midnight, also draw a block from the start of the day to 06:00; FocusMe treats the two as one continuous run. See Block Your PC at Night. Weekend study: select Saturday and Sunday and draw 08:00 – 13:00. Split day: on each weekday draw 09:00 – 12:00 and 13:00 – 17:00, leaving lunch free.Tips
- Start with your real routine. Schedule the hours you actually need to focus, not an idealised version.
- Leave gaps. You need unblocked time too.
- Combine with protection. A weekly schedule with Lock it Down is the ultimate set-and-forget setup. Before you use an Enforced stop challenge, set an end date.
- Adjust as needed. Open the plan with Edit and move the blocks. Protection permitting, blocks can be changed even while the plan is running; while it runs, a block’s mode can only be tightened to Block.