

The Plans Dashboard
When you open FocusMe you land on the Plans tab, titled Manage Your Plans. The toolbar has three buttons: Quick Setup (shown only while you have no plans), Plan Library, and Add a Plan.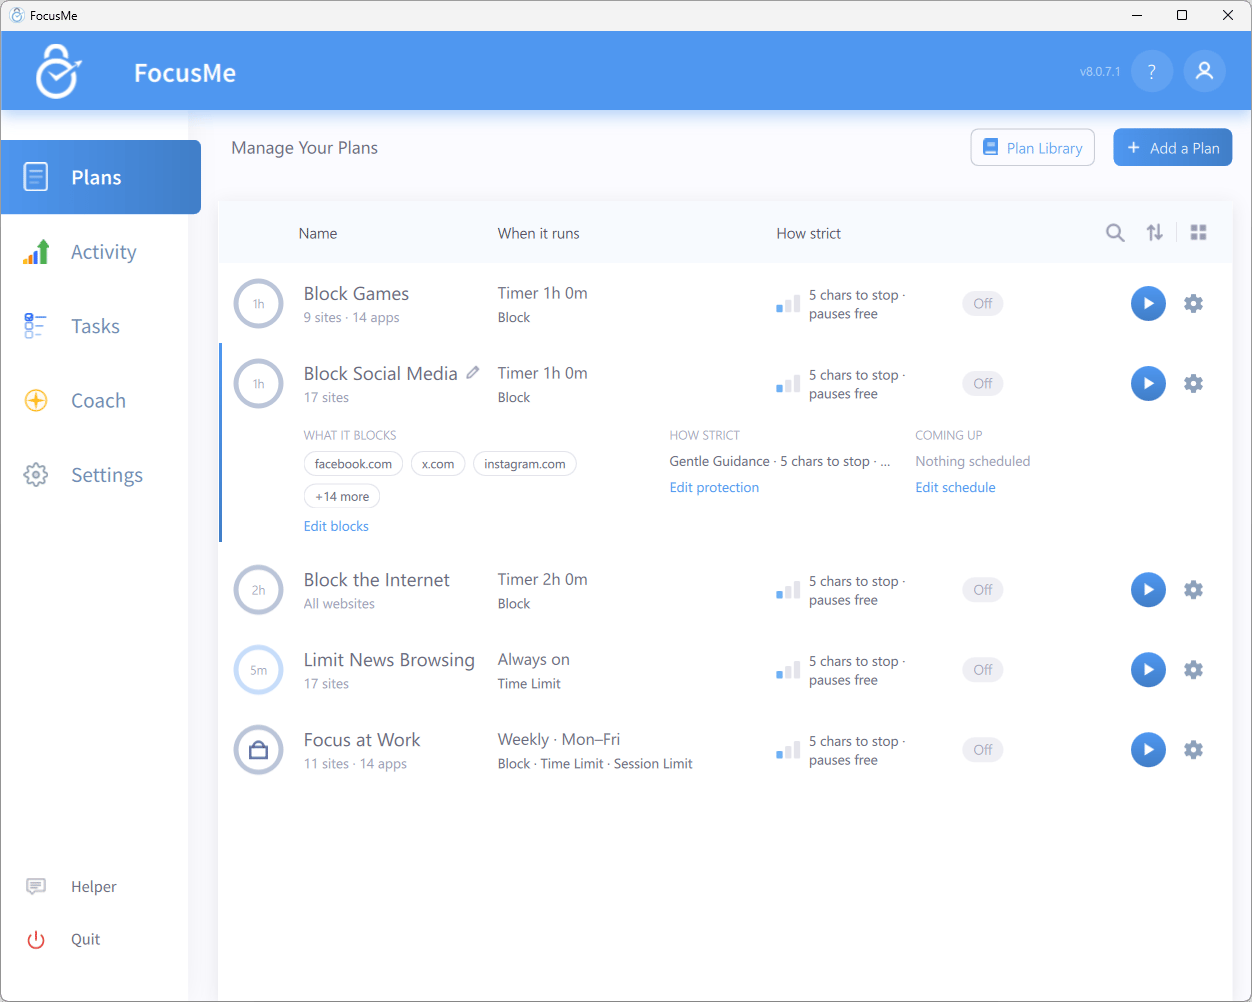
The Plans list with one plan expanded into its drawer
The list
Each plan is a row. It starts with a progress ring, followed by three columns:
To the right of the columns sit a status pill (Active, Standby, Starting, Stopping, Paused, Counting, Break, Waiting, Expired, or Off), a round play/stop button, and a gear icon (a ⋮ button while the plan is on).
Clicking different parts of a row takes you to different places:
- Single click the ring, name, timing, strictness, or status to open the plan’s drawer (below).
- Double-click the name or status to open the plan in the Plan Wizard.
- Double-click the ring or the When it runs cell to jump straight to the wizard’s When it runs step, How strict to jump to that step, or a counts segment such as
12 sitesto open What to block at that list. - Right-click for the context menu.
The drawer
A single click expands a row into an inline drawer with a 0–24 h track for today and three columns:- WHAT IT BLOCKS — the targets, with an Edit blocks link
- HOW STRICT — the protection tier and its settings, such as
Gentle Guidance · 5 chars to stop · pauses free, with Edit protection - COMING UP — the plan’s next changes today (or Nothing scheduled), with Edit schedule
Tiles, search, and sorting
The icons at the top right of the list give you:- Tiles view / List view — one button switches between the list and tiles. Tiles show the ring, name, timing, strength bars and status pill in a grid. Click a tile to expand it full-width with the same drawer content, and drag tiles to rearrange them.
- Search — click the magnifier or press Ctrl+F and type in Search plans… to filter the list.
- Sort — tick Sort by name to sort alphabetically (untick it to go back to your own drag order), and tick Group by status to split the list into RUNNING, READY, and OFF groups with collapsible headers.
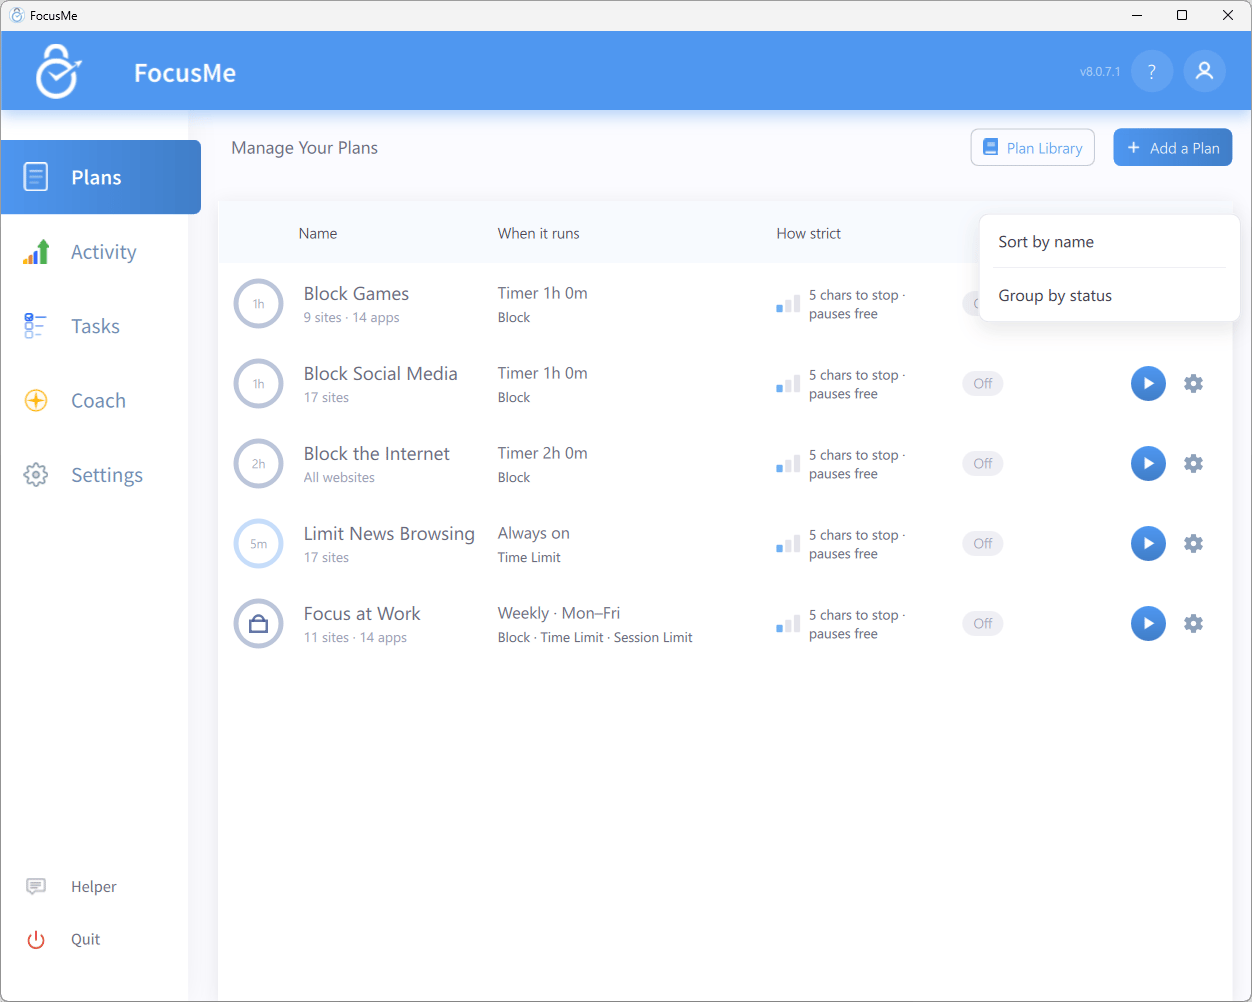
The sort menu: Sort by name and Group by status
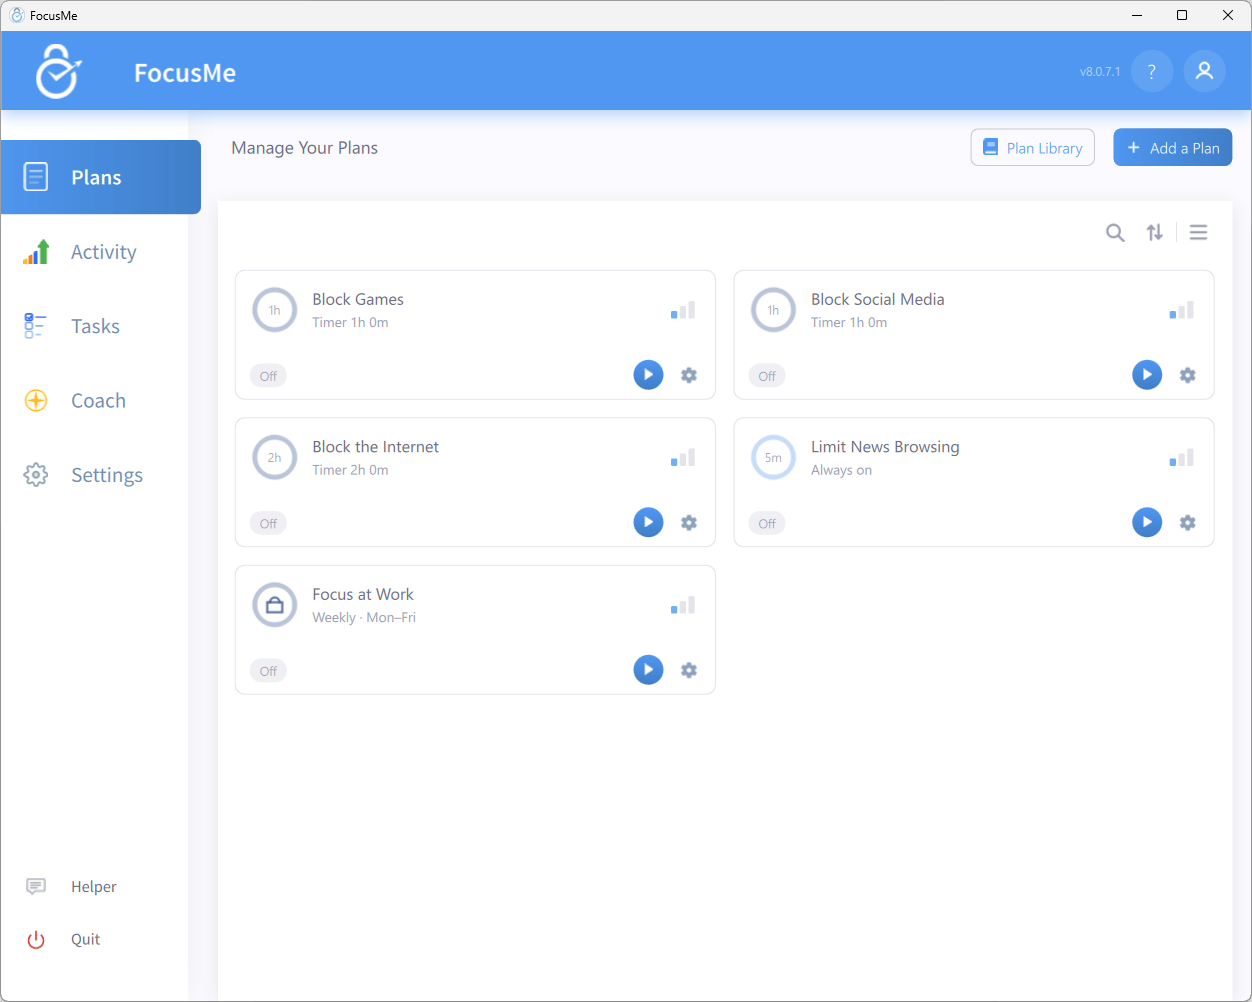
The Plans list in tiles view
The Today panel
Above the list, a collapsible TODAY strip summarises the day: how many plans are blocking now, when the next change happens, and one 0–24 h lane per plan scheduled today — including running quick timers and delayed starts. Click a lane to reveal that plan in the list. The panel is hidden when nothing is scheduled today.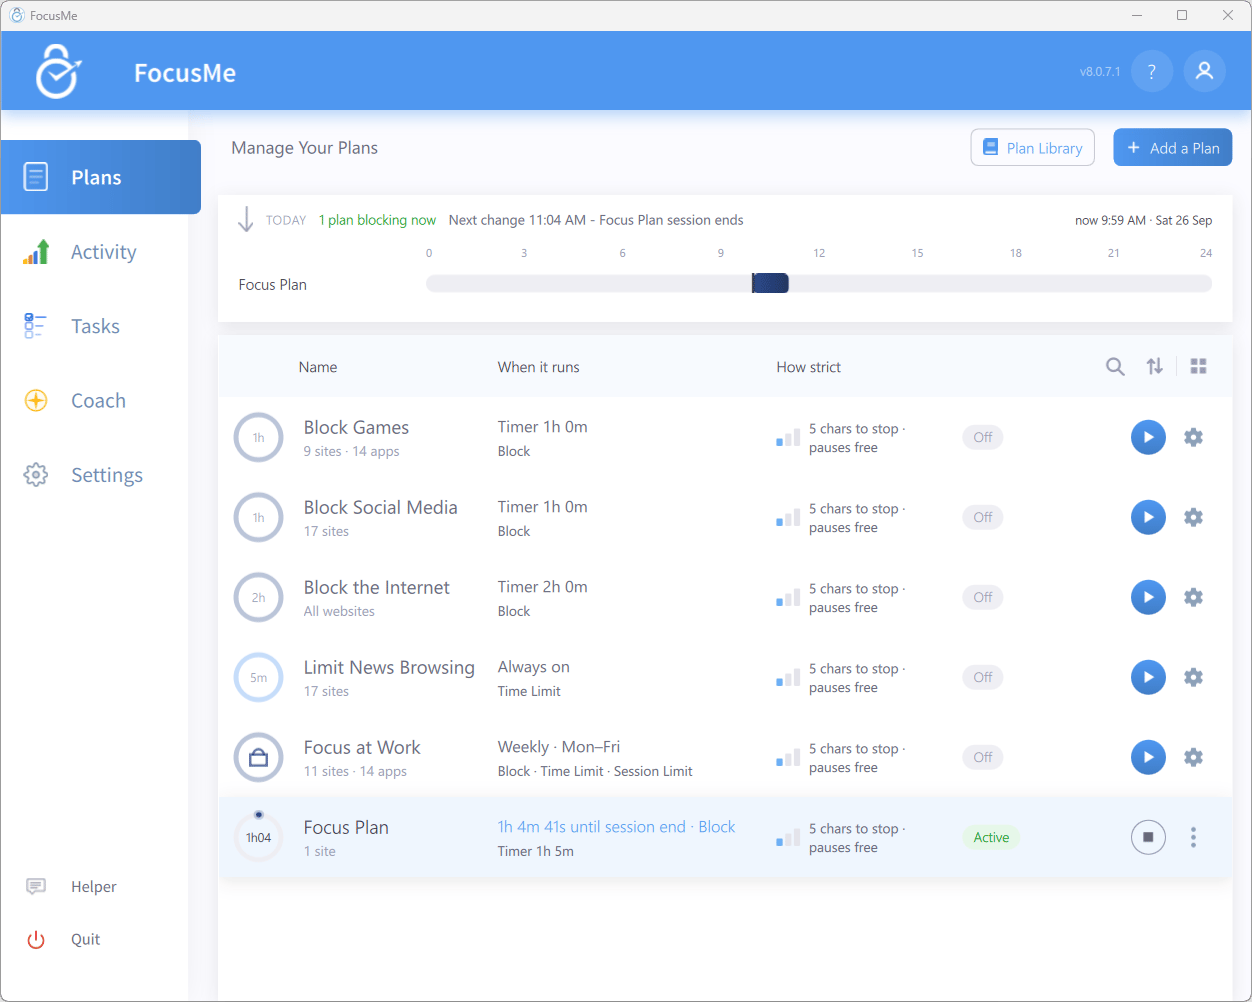
The TODAY panel with one plan blocking now
Anatomy of a Plan
Every plan is built in the Plan Wizard, which has four steps: What to block, When it runs, How strict, and Review.1. Targets — What to block
The Websites and Applications tabs each hold a Blocked list and an Allowed list (the Allowed list is under Advanced). Type a site or app into the add row and click Add, use Bulk add websites… or Pick from installed apps… for the full pickers, or load a ready-made list from the Lists: row. Ways to set up targets:- Block some websites or apps — leave Plan blocks on Block selected things and add them to the Blocked list
- Block everything except a few — choose Block every site except my list (or Block every app except my list) and put the exceptions on the Allowed list
- Block entire computer — set Plan blocks to Block entire computer to cover every app and website with a full-screen break
2. Schedule and rule modes — When it runs
Choose how the plan is timed:
Each time block on a Weekly Schedule or Multi-Day Plan has its own rule mode, chosen on the timeline:
So one plan can block social media during work, allow a time limit at lunch, and set a session limit in the evening. Rule settings are edited inline on the same page. See Rule Modes and Schedule Modes.
3. Protection — How strict
Four presets cover most needs:
Click Customize to set each challenge individually — stopping while active or on standby, skipping breaks, pausing, adding to the allow list, and editing the plan. The list shows Custom when no preset matches. See Plan Protection.
4. Review
The last step lists Blocks, Schedule, and Protection with an Edit link for each, plus Devices when you’re logged in. An Options expander holds the description, notifications, floating timer, and idle timeout. Click Create & Enable to create the plan and start it, or Create to create it and leave it off. (On steps 1–3 the same secondary button reads Create now.)Running Multiple Plans
You can run any number of plans at once. Common combinations:- Focus at Work — blocks social media Mon–Fri 9–5 (Weekly Schedule + Block)
- Screen Breaks — a 5-minute break every 45 minutes (Screen Break)
- Evening Wind-Down — blocks everything after 10 pm (Block entire computer + Lock it Down)
- Limit Social Media — 30 minutes of social media a day (Time Limit)
Penalty
The Penalty punishes repeated attempts to open blocked targets. Once you have been blocked a set number of times within the reoffence window, FocusMe blocks all apps (on the Applications tab) or all internet access (on the Websites tab) for the penalty duration. Turn it on in step 1 (What to block): expand Advanced, and in the Blocking behaviour panel tick Penalty. The Penalty Configuration dialog has three settings: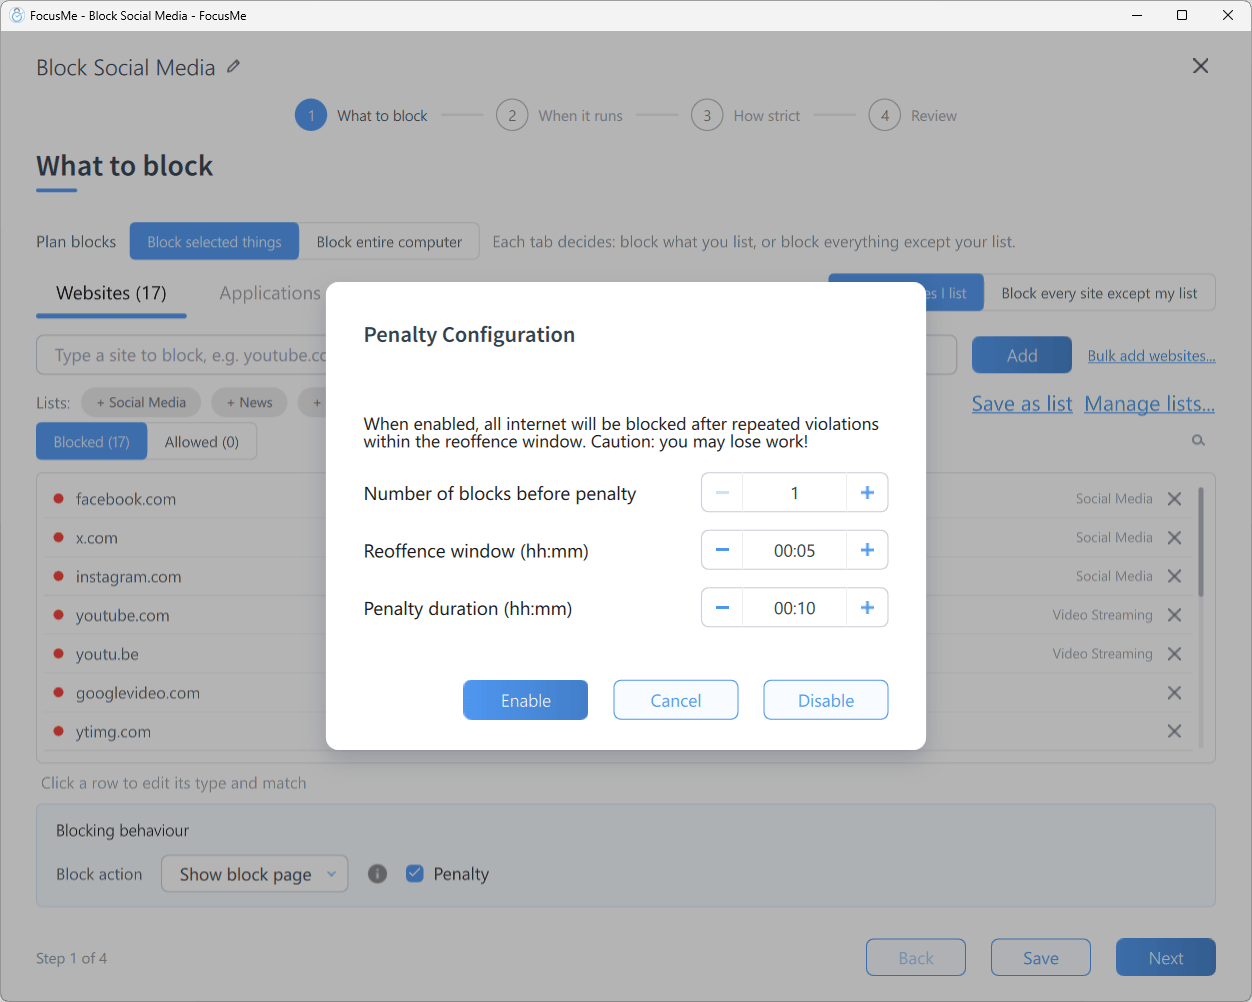
Penalty Configuration
Idle Timeout
Idle Timeout stops the clock while your computer is idle, so stepping away from your desk doesn’t eat into a time budget or trigger an unnecessary screen break. It is on by default and matters most for Time Limit, Session Limit, and Screen Break plans. Find it in the Review step under Options.Notifications
Each plan has its own notification checkboxes, also under Review → Options: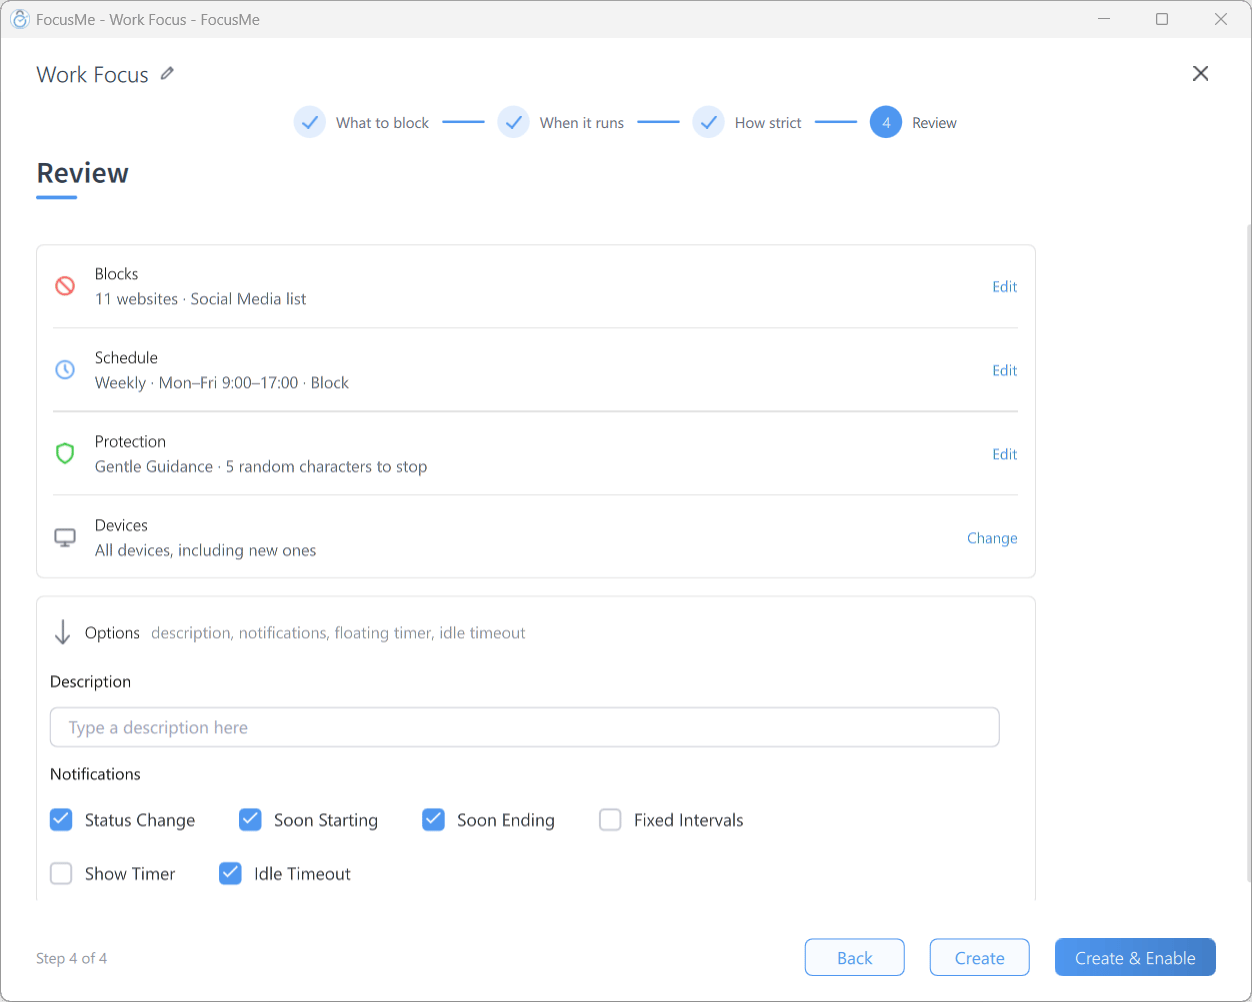
The Options expander on the Review step — description, notifications, Show Timer and Idle Timeout
- Status Change — the plan started, stopped, or paused
- Time Limit Usage — progress against the budget, on plans with a Time Limit interval
- Soon Starting — advance warning before a scheduled plan activates
- Soon Ending — warning before a session or time block ends
- Fixed Intervals — periodic reminders that the plan is active